Tampilkan postingan dengan label GLUTEN FREE. Tampilkan semua postingan

Cannellini Beans With Roasted Butternut SquashInstant Pot And Stove Top Recipes

Maret 08, 2018 0
Roasted butternut squash adds a natural sweetness to this dish.

Follow Foods For Long Life on Pinterest and Facebook.

Beans for Fiber, Protein and More
For those of you who have vowed to eat less meat this year, you will be happy to know that you can get lots of high quality protein from beans. Unlike with meat, this protein comes with critical dietary fiber, antioxidants, and complex carbohydrates that will stabilize your blood sugar and help lower your cholesterol. The best part about this protein source is that it doesn't come with saturated fat and cholesterol. So add some to your diet each day.

Winter Squash
I had a wonderful winter squash harvest this year so I'm looking for recipes to use them up. Last week, my friend Margarite brought over some cannellini beans with roasted butternut squash. The roasted squash gave the beans a beautiful sweet flavor. Here's my attempt to duplicate this lovely recipe. You can make the beans in an Instant Pot or just cook them on the stove, but always start with dry beans. I don't think canned beans would taste as good.

Some of my winter squash harvest.
           
    *                       *                       *                     *

Cannellini Beans with Roasted Butternut Squash
Vegan, Dairy Free, Gluten Free
[makes 6 servings]

Beans can be made in an Instant Pot or on the stovetop.

Allow time to soak beans overnight.

Ingredients
1 1/2 cups dry cannellini beans 
Water for soaking
4 cups rich vegetable stock
1 medium onion, diced
3 cloves of garlic, peeled and sliced
1 bay leaf
1 1/2 pound butternut squash
2 tablespoons extra virgin olive oil
1 teaspoon salt
1/2 teaspoon pepper
1/2 teaspoon garlic powder
1 teaspoon dried rosemary
1 tablespoon freshly squeezed lemon juice or splash of vinegar (optional)

Directions
Pick through the cannellini beans for rocks and rinse well. Place in a pot, cover with 2 inches of water, and soak overnight.  If you forgot to soak the beans overnight you can place them in a pot with 2 inches of water, bring to a boil on medium heat, turn off the heat, and let the beans sit in the pot, covered, until the water cools down. One and a half cups of dry beans should plump up to about 3 1/2 to 3 3/4 cups of soaked beans.

Rinse the soaked beans well. If you are cooking them on the stovetop, place the beans in a large pot or 5-quart Dutch oven with the stock, onion, garlic, and bay leaf. Cook until tender. You may need to add more broth if it cooks down.

If you are using an Instant pot pressure cooker, place the soaked and rinsed beans in the pot along with the stock, onion, garlic and bay leaf. Hit the manual button and set for 6 minutes under high pressure. Make sure the quick release switch is in the closed position. 


When it's done, hit the off button and let the pressure come down naturally. When complete, open the cover and tilt so that the steam comes out the back and away from your face. Test for doneness. 

Preheat the oven to 400 degrees F.

While the beans are cooking, clean the squash. Check out my post on An Easy Way to Cut a Butternut Squash. Dice the squash and place in a bowl with the olive oil, salt, pepper, garlic powder and dried rosemary. Toss until well coated and spread out on a non-stick shallow baking pan or one lined with a Silpat silicon mat. Roast in the oven for 30 to 40 minutes, stirring halfway through, until cooked and slightly golden brown.

You may notice that I have heavily seasoned the squash. Once cooked, the squash will be used to season the beans so don't skimp on the salt and other seasonings.

Before baking
After roasting

Remove the roasted squash from the oven and set aside.

After the beans are cooked (using either method), stir the cooked squash into the beans. Simmer the squash and beans together so that their flavors melt together. If on the cooktop, simmer on low for 15 to 20 minutes. If in the instant pot, you can either hit saute for 10 minutes or slow cook for 30 minutes. 


Taste for seasoning and adjust if necessary. Stir in lemon juice or vinegar, if desired. 

Serve immediately over rice, quinoa, or your favorite grain or pasta, or refrigerate. They will thicken and become even more flavorful the next day. This is a good dish to make on Sunday and serve a few times during the week.

Cannellini beans with roasted butternut squash
served over GABA sprouted brown rice.

Nutritional Information
Per Serving: 261 calories, 7 g total fat, 1 g saturated fat, 151 mg omega-3 and 769 mg omega-6 essential fatty acids, 10 g protein, 41 g carbohydrates, 9 g dietary fiber, and 399 mg sodium.


Make Soy-Free Tofu From Garbanzo FlourBetter Than Soy For Hyperthyroidism

Februari 06, 2018 0
Garbanzo tofu is low in calories, high in protein and fiber.
Follow Foods For Long Life on Facebook and Pinterest.

Sluggish Thyroid?
My naturopath told me to give up soy products and raw cruciferous vegetables. But why when they both seem so healthy? Well, it turns out they are very healthy but not for people who have hypothyrodism. 

Raw cruciferous vegetables, such as broccoli, cabbage, cauliflower, etc., and soy are high in substances called goitrogens, which can wreak havoc on your thyroid gland. These cruciferous vegetables are fine, however, if they are steamed. And soy is ok if it's fermented. Soy also produces estrogenic isoflavones, which can also negatively effect the thyroid, especially if you are iodine deficient. 

Hypothyroidism is where your thyroid doesn't produce enough thyroid hormone and it's pretty common for women over 60, like me. I only had a few symptoms, but my TSH was an itsy, bitsy above 4.0 - not nearly enough to need medication, but high enough to do everything I can not to let it get worse. So, no more soy (except fermented) or raw cruciferous veggies. Gluten sensitivity also can contribute to hypothyroidism so she tested me for that too. Bingo - I had to give up gluten!  

If you have any of these symptoms, you might want to check your levels of TSH. (Normal levels are from 0.4 to 4.0 milli-international units per liter.)

* Fatigue
* Increased sensitivity to cold
* Dry skin
* Constipation
* Weight gain
* Puffy face
* Hoarseness
* Muscle weakness
* Elevated cholesterol levels
* Muscle aches, tenderness and stiffness
* Joint pain
* Thinning hair
* Depression
* Impaired memory
* Slowed heart rate
* Changes in menstrual cycle

But I Love Tofu!
I used to eat a lot of tofu so giving it up was really hard. But last week my daughter turned me on to making tofu out of garbanzo flour. I couldn't wait to try it. It literally took 15 minutes to make and it came out great, so today I want to share this miracle with you!


1/4 cup garbanzo flour provides:
110 calories
2 g saturated and 0 g unsaturated fat
18 g carbohydrates, 3 g sugars
6 g protein
5 g dietary fiber
5 mg sodium


                          *                                 *                                  *

Garbanzo Tofu
Vegan, Gluten and Dairy Free
[makes 4 servings]

Requirements
A small square pan (6x6) or small rectangle pan
Best with a blender

Ingredients
Oil for greasing the pan
1 cup stone ground garbanzo bean flour
2 cups water
1/2 teaspoon salt, or to taste 

Directions
Grease the pan with oil.

Blend the flour, water, and salt in a blender until smooth.


Cook in a saute pan on low-medium heat, stirring continually, until smooth. It will first get lumpy and then will smooth out in about 4 minutes. 


This is the hard part. As soon as it smooths out, quickly scoop it into the greased pan and smooth it out before it hardens. It may look uneven and ugly, but it will still be great since you will be slicing it.


Let it cool completely. If it's not hard enough, after cooling you can refrigerate it but mine was good to go after a short while. Turn upside down and release it from the pan onto a cutting board. Slice and use the way you would use tofu.


Saute in a pan
Once browned, use in a stir fry, on top of a salad, in a burrito, etc.

I cooked up a stir fry with it and it was absolutely delish! Thanks to my daughter, Linda, for introducing me to this new soy-free form of tofu!


Nutrition
Per serving of tofu only: 110 calories, 2 g total fat, 0 g saturated fat, 0 mg cholesterol, 6 g protein, 18 g carbohydrates, 5 g dietary fiber, and 295 mg sodium.
Instant Pot Garlicky Mashed Cauliflower Vegan And Paleo FriendlySuper Low Calorie!

Januari 17, 2018 0
Use mashed cauliflower as a tasty side or a bed for a stew.

Follow Foods For Long Life on Pinterest and Facebook.

Mashed Potato Substitute
I adore mashed potatoes but nutritionally they can't compare to cauliflower. When you properly prepare and mash cauliflower, you really can't tell the difference. And with cauliflower, you get a lower calorie and carb substitute with the cancer-fighting benefits of a cruciferous vegetable. Cauliflower is also super rich in antioxidants, and a great source of dietary fiber, vitamin C, K, B6, folate, pantothenic acid, potassium, and manganese. 

Today's recipe also replaces the typical butter and cream in mashed potatoes with the heart-healthy, mono-saturated fat of an avocado. OK, it turns the mash a tiny bit green, but it makes them super creamy, and adds more dietary fiber, vitamin K and folate. For an added burst of goodness, this recipe flavors the mash with fresh garlic!

               *                                    *                                       *

Garlicky Mashed Cauliflower
Vegan, Paleo, Dairy and Gluten Free
[makes 4 to 6 servings]

Requirements
Instant Pot 
Food Processor 

Ingredients
1 tablespoon olive oil
2 cloves garlic, minced
1 large head cauliflower, cut into florets
1/2 cup water 
1/2 teaspoon salt, or to taste
1/4 teaspoon pepper, or to taste
1/3 avocado, room temperature

Directions
Heat the oil in the Instant Pot using the SAUTE function. Add the garlic and cook until slightly brown. 


Press the OFF button and immediately add the cauliflower florets, then the water, salt, and pepper. 


Secure the lid, press the MANUAL button and set for 4 minutes. When done, press the OFF button and quickly release the pressure. Carefully remove the lid.

Drain and reserve any remaining liquid from the pot. 

Place the drained cauliflower into the food processor. Add the avocado and process until smooth. If it is too dry, add a tiny bit of the reserved liquid at a time. Do not add too much liquid or it will be too soft. 


Serve as a side vegetable or as a bed for stew, peas, tomato sauce, etc..


Serve as a side dish

Or serve as a bed for stews and sauces.

Nutrition
Per serving (4): 104 calories, 5 g total fat, 1 g saturated fat, 0 mg cholesterol, 116 mg omega-3 and 548 mg omega-6 fatty acids, 4 g protein, 13 g carbohydrates, 6 g dietary fiber, and 355 mg sodium.

Per serving (6): 69 calories, 4 g total fat, 0.5 g saturated fat, 0 mg cholesterol, 78 mg omega-3 and 365 mg omega-6 fatty acids, 3 g protein, 8 g carbohydrates, 4 g dietary fiber, and 237 mg sodium.
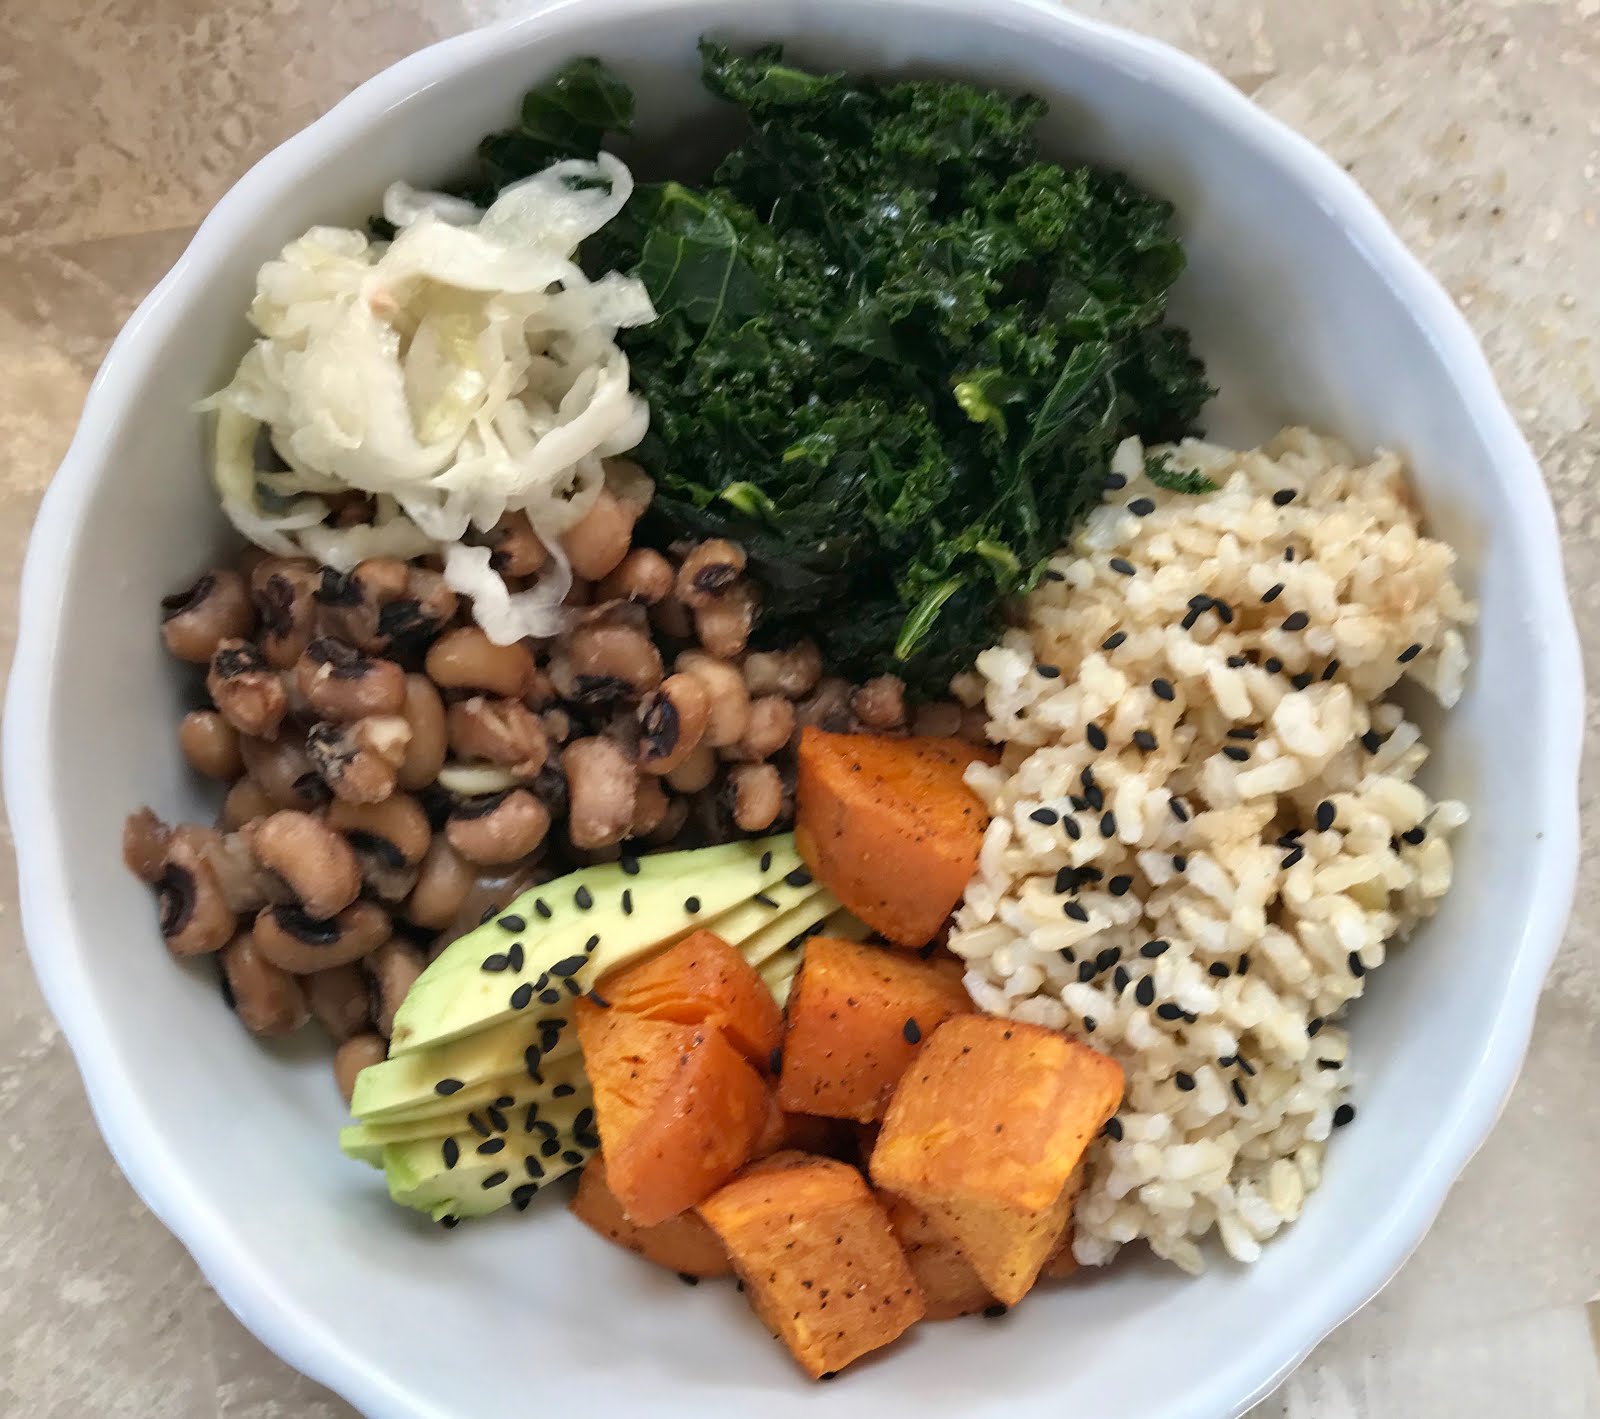
Lucky Black-Eyed Pea Macro BowlStart The New Year Off RightHow To Construct A Macro Bowl

Januari 01, 2018 0
Eat Black Eyed Peas on New Year's Day for good luck!

Follow Foods For Long Life on Facebook and Pinterest.

My Annual Black-Eyed Pea Recipe
I learned, when living in Texas, that eating black-eyed peas on New Year's day brings good luck. Sometimes it works, sometimes it doesn't - but I don't dare start the year without them, just in case. To make sure I didn't mess with tradition, my daughter even sent me a pound of these lucky charms from Minneapolis for Christmas. 

I must admit, black-eyed peas aren't my favorite food so it's even more challenging to come up with a yummy recipe every year. But this year, I'm very excited about this macro bowl - especially because it's complemented with a tasty tahini sauce.

This recipe is a bit complicated as I use my Instant Pot for the kale and black-eyed peas, the oven to roast the potatoes, and my rice cooker to prepare the GABA rice. But it's all worth it in the end and, after all, it's New Year's day!

Constructing a Macro Bowl     
Macro bowls are very versatile and extremely healthy as they include a nice variety of foods. Here's how I construct mine:

#1 Protein  
For your protein, you can use any bean, tofu, tempeh, even shrimp or salmon.

#2 Greens
Steam kale, chard, spinach, mustard or other greens.

#3 Root Vegetables
Roast carrots, parsnips, sweet potatoes, new potatoes, turnips, or any other root vegetable. Just dice, toss with a little oil, sprinkle with salt, pepper, and granulated garlic, and bake for 30 to 40 minutes until cooked and brown.

#4 Grain
Use white, black, brown, or GABA rice, millet, quinoa, farro (not gluten free), or any of your favorite grains. 

#5 Avocado
Avocados make everything taste better. 

#6 Seaweed or a Fermented Vegetable
I usually put some raw sauerkraut or seaweed salad on my macro bowls, whichever I happen to have in the house. It's always good to have a fermented food as part of your meal. Your microbiome will thank you.

#7 A Yummy Sauce
Top your macro bowl with your favorite sauce. Today I made a tahini sauce but any of your favorite sauces will do.

#8 Seeds
Sprinkle your macro bowl with hemp, black or white sesame, pumpkin, or sunflower seeds for added nutrients.

When plating your macro bowl, be aware of the colors of the ingredients and place them to optimize the contrast. 

                     *                            *                             *

Black-Eyed Pea Macro Bowl
Vegan, Gluten and Dairy Free

Ingredients PER PERSON
1/2 cup cooked black-eyed peas
1 cup steamed kale
1/2 sweet potato, diced and roasted
1/3 - 1/2 cup cooked rice or other grain
1/4 avocado, sliced
Small serving of raw sauerkraut or seaweed salad
Teaspoon of black sesame seeds

For the sauce (4 servings, ~ 1/2 cup)
2 tablespoons raw tahini
1 tablespoon cold-pressed hemp oil
1 tablespoon soy sauce
1 tablespoon agave or honey
1 tablespoon fresh lime or lemon juice
1 large garlic clove, pressed
1 inch fresh ginger, peeled and grated
Pinch cayenne
1 tablespoon water

Directions
Cook the black-eyed peas on the stovetop according to package directions. Or use canned black-eyed peas.
To cook in your Instant Pot, place unsoaked dry peas in the instant pot with a bay leaf, some onion and celery, and cover with at least two inches of water. Set Manual to 6 minutes. When done, let pressure come down naturally. Move them to a covered dish to keep warm. If using your Instant Pot to make the greens, rinse out the Instant Pot.

Black-eyed peas take 6 to 7 minutes in the Instant Pot. Cover with enough water as they will swell.

Clean kale, remove stems, and thinly slice. Steam kale on stovetop until tender. To cook in your Instant Pot, place in the pot with 1/4 cup of water, a touch of salt, and 1 teaspoon of extra virgin olive oil. Set Manual to 3 minutes. When done, release pressure and remove.

To roast the sweet potatoes, preheat oven to 425 degrees F. Place small diced potatoes in a shallow roasting pan (I like to line the pan with a silicon baking sheet). Drizzle with a tablespoon or two of olive oil, sprinkle with salt, pepper, and granulated garlic to taste and mix well. Roast for 30 to 40 minutes, stirring half way through.

Cook rice in your rice cooker, or on the stovetop, according to directions. I used GABA rice because my daughter gave me a beautiful GABA rice cooker a few years ago and it cooks any kind of rice to perfection, but any type of rice or grain will do.

Make the sauce: Place the tahini in a small bowl and slowly stir in the remaining ingredients until well combined. 

Use fresh limes or lemons

Build the bowl: Get a good size shallow bowl. Place the cooked greens in the bowl. Next, the rice, then the roasted sweet potatoes, then the seaweed salad, avocado, and black eyed peas. Sprinkle with black sesame seeds and serve with the tahini dressing.

If you use sauerkraut instead of the seaweed salad, place that near the peas.


Happy New Year!
May you enjoy outrageous health and happiness in 2018!


2-Ingredient Flourless Chocolate Cake

Desember 21, 2017 0
This cake is dairy and gluten free!

Follow Foods For Long Life on Facebook and Pinterest.

Great Cake for the Holidays 
As more and more guests show up with gluten and dairy allergies, this is a good dessert to have on hand. It is not vegan, however, as it needs eggs. At the end of this post, you can read about my efforts to veganize this recipe. 

First I will say that I did not invent this. My friend Margarite saw it on the internet and told me about it after I showed her a flourless chocolate cake I found in a magazine. That particular cake had almond flour, tons of sugar, butter, and was very high in calories. I knew that I could make it healthier and even try to make it vegan. But then she showed me this recipe that only had two ingredients - chocolate and eggs. I couldn't believe it! Although she had seen the recipe, she had never made it so I invited her over for the big experiment.

If you make it with vegan chocolate, it will be dairy and gluten free. My favorite chocolate is Endangered Species Natural Dark Chocolate - 72% cocoa. You can use any of your favorite chocolate chips or chocolate bars - you just need 9 ounces.


You can also spruce up the cake with berries and powdered sugar. 

                    *                              *                                  *

Two Ingredient Chocolate Cake
(Gluten Free, Dairy Free if using vegan chocolate)
makes 6 servings

Requirements
6-inch Spring Form Pan

Ingredients
4 large eggs, room temperature
9 ounces chocolate 
Powdered sugar (optional)
Raspberries to garnish (optional)

Directions
Preheat the oven to 325 degrees F. Grease a 6" spring form pan.

Place the chocolate in a microwave-safe bowl. Place the bowl in the microwave and cook, in 30 second increments, until the chocolate melts. This can take 1 minute or slightly longer. You can also melt the chocolate in a double boiler, which is a bit messier.

Melted chocolate

Separate the eggs. Place the whites in a large, clean, glass bowl. Whip until soft peaks form. This can take a while so be patient. 

Beaten egg whites

Let the chocolate cool a bit and then, one by one, whip each yolk into the chocolate until well combined.

Gently fold 1/3 of the whipped egg whites into the chocolate/egg yolk mixture. Then repeat with the next 1/3 of the egg whites. And finally, with the last 1/3 of the egg whites.


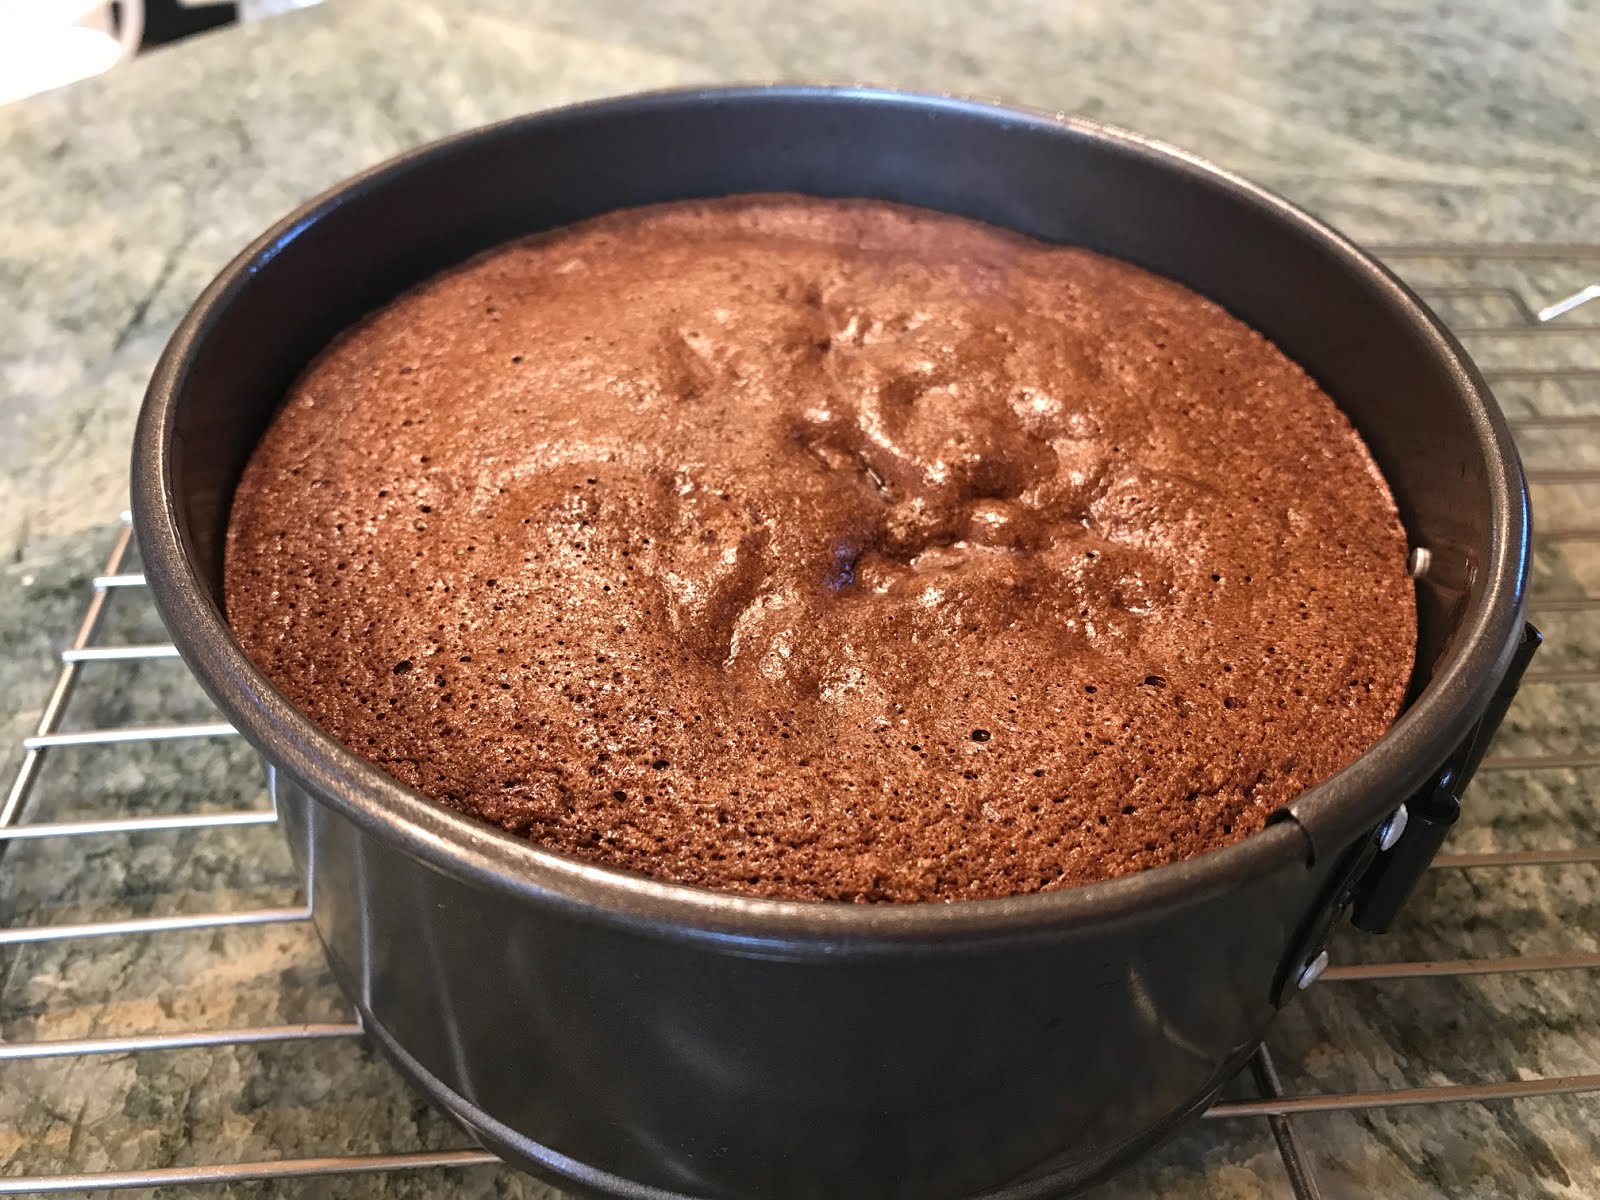
Pour the batter into the greased 6-inch spring form pan and bake for 30 minutes.

Cool on a cake rack for 15 minutes or so. Then, release.


Release and serve

You can dress this up with powdered sugar, berries, or a scoop of non-dairy ice cream!

Nutrition:
Per serving: 258 calories, 21 g total fat, 12 g saturated fat, 141 mg cholesterol, 7 g protein, 21 g carbohydrates, 12 g sugar, 5 g dietary fiber, and 47 mg sodium.

Sometimes you just need an egg!
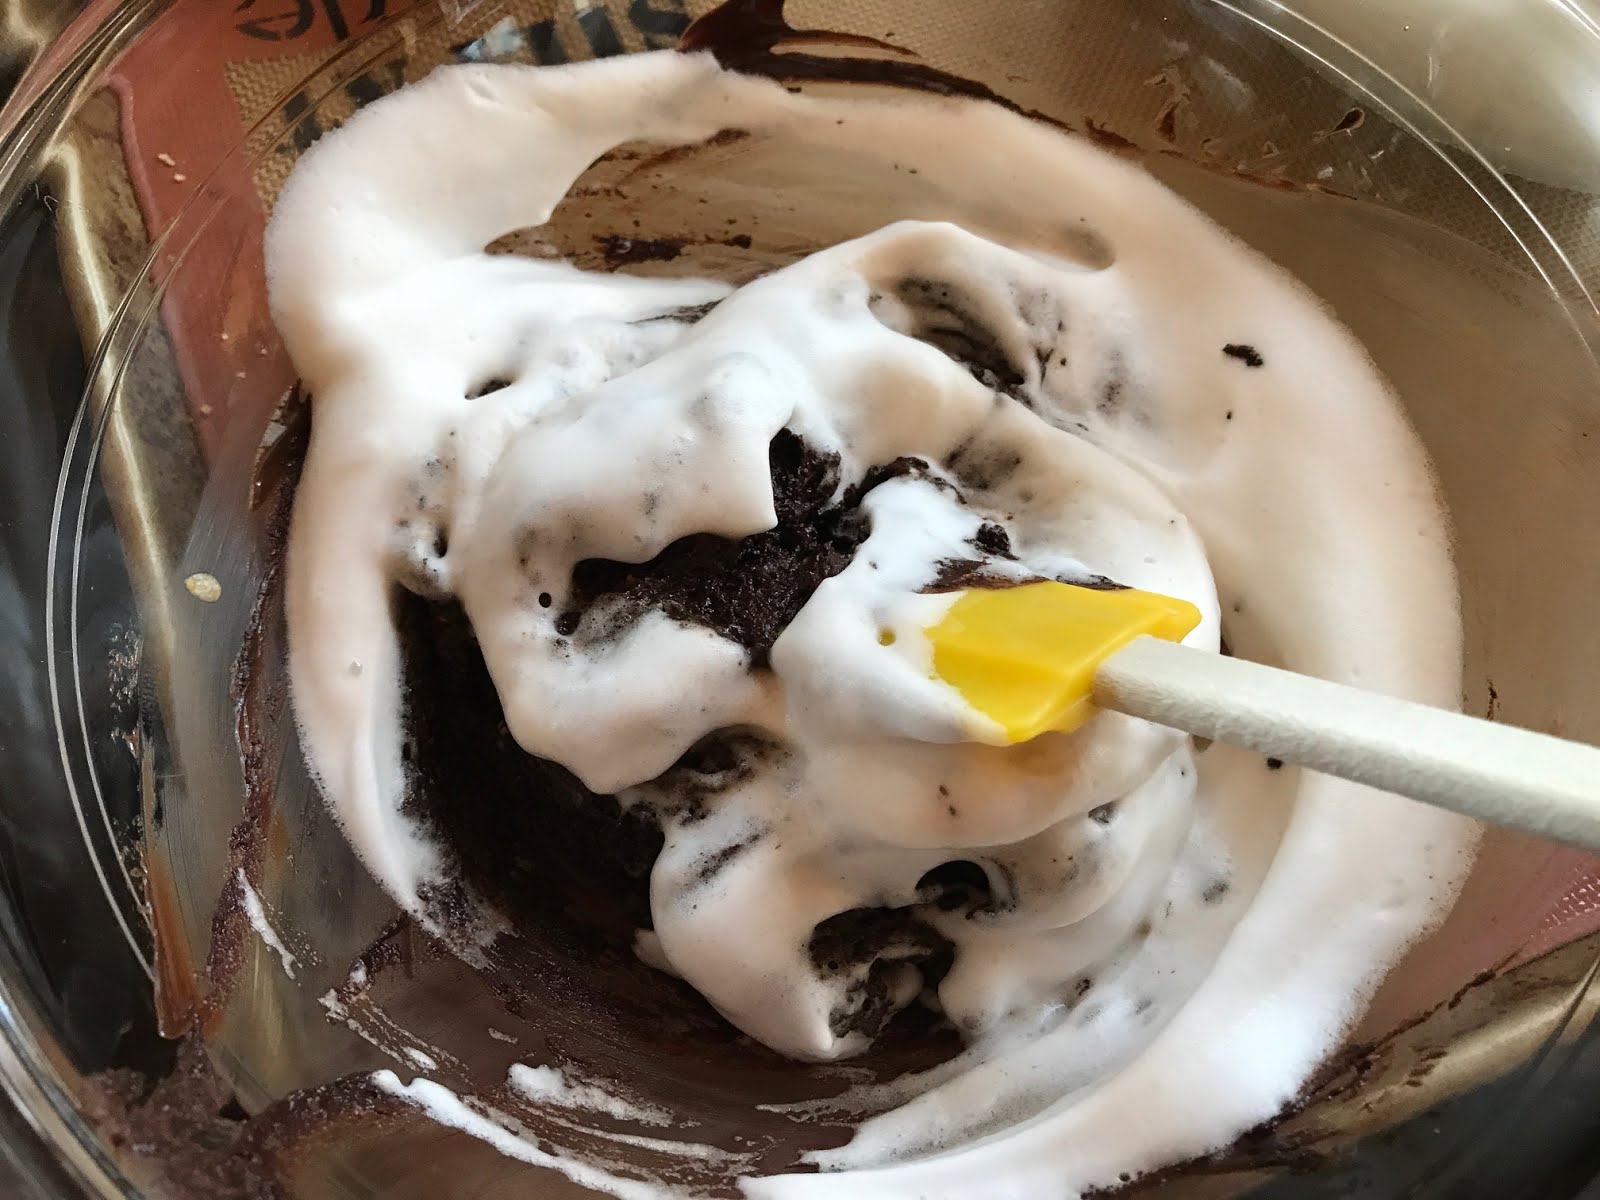
For my vegan followers, I tried really hard to make this vegan. I whipped up aquafaba (garbanzo bean juice) into beautiful peeks of "egg" white. I replaced the yolks with flax eggs and the result was a complete failure! I won't give up trying, but if you want a good laugh, here's how my vegan experiment turned out. It was basically a melted chocolate bar. We scraped it off and ate it anyway :-)

Sometimes you just need an egg!